Showing posts with label teaching tips. Show all posts

Sunday, October 28, 2012

Hints & Tips for Teaching Children

Here are some helpful tips for those of you teaching age 2 through grade 6. For more teaching tips, visit the Teaching Tips section of our website.

Ages 2 & 3

"Me. Mine."
Twos and threes do not understand sharing. This is evident in the frequent use of the words "me" and "mine." This is not all bad. It is a necessary stage before sharing can take place. Before a child can learn to share something, he must learn to possess it. Sharing is voluntarily giving up what we possess.

Ages 4 & 5

Language Explosion
At ages four and five, a preschooler's vocabulary increases tenfold, from 150 words to 1500 words! You can help them manage this explosion of words by doing two things. First, teach preschoolers how to use their new words correctly by speaking to them in complete, literal sentences. Second, let them practice using their new words by asking them to retell a story.

Grades 1 & 2

Keep it concrete
Primaries are making tremendous intellectual progress. By this age they can manipulate data mentally, come to some logical conclusions, and define, compare, and contrast things. But they still do not understand symbolism. After touring the defense plant where her daddy worked, one first grader resisted when told it was time to go home. She cried, "But I haven't seen where Daddy makes the money yet!"
When teaching primaries, say what you mean and mean what you say. Always teach them in literal concrete terms. 

Grades 3 & 4

Bounce this idea around
Think of your words as tennis balls. Every idea or lesson point is one ball. When you teach using the lecture method, you are tossing several balls to the children and expecting them to catch and hold on to all of them. (How many balls do you think the children can handle before they start dropping some of them?) When you teach using a question/answer method, you toss out a ball (your question) and ask a child to hold it and then toss back a ball of his own (a stab at an answer). Is your teaching a singles match between you and one other child or do you see that everyone gets a chance to handle the ball? When you use group discussion, you toss out a ball and ask a child to toss it to another child, then to another and to another. How many balls can your children juggle at one time? By thinking of your words as tennis balls, you can visualize what you are expecting the children to do with the concepts you toss their way.

Grades 5 & 6

A Record of Faith
Even though God's work is incredible, we often forget about experiences not long after they happen. Keep spiral notebooks on hand and let your preteens write their names on the outside. Encourage them each week to keep journals of their faith journey. They might write prayers or record answered prayers, describe how they saw God at work in the previous week, jot down thanksgivings, or write what this week's Bible memory verse means in their life. Keep the journals in a special place and allow the children to write in them once they have finished any class projects.

Sunday, October 21, 2012

5 Tiny Training Tips

by Donna Lucas
Publishing Director
Gospel Light /Children’s Ministry Resources


It’s never easy to get all of your Children’s Ministry volunteers together in one place! You can advertise the most fabulous training event and party, and yet it’s nearly impossible to get every teacher to come.

If you’re passionate about Children’s Ministry, you know that these questions always haunt the back of your mind:

How can I help my volunteer teachers see the importance of what they are doing? 

How can I help my volunteer teachers grow in their abilities?

For imparting vision and helping them see the importance of what they are doing, here are five tiny training tips for any teacher!

1.    KNOW the Bible content. No matter how well you think you know it, read the story again from the Bible. (You’ll be surprised at what you’ve forgotten!) Read it again from the teachers’ guide. Mark your Bible ahead of time with sticky notes and a highlighter. Now you’re free to act out the story, tell it in “first person” mode or do whatever works in that class, that day—because you never know if what you planned to do will result in kids getting that “blank” look. With the content “in” you, you’re free to switch up your method to make the “lights go on” in their eyes!

2.    Write the Big Idea or main point somewhere where YOU can see it. This helps you repeat it whenever you need to—and it keeps you on track!

3.    Highlight the activities and ideas you want to use for this class. Then be sure you have all of the materials. With so little time, you don’t want to waste time rifling through the pages or looking for missing materials!

4.    Prepare them socially. We can all remember those horrifying discoveries we made as preteens—feet too big, nose the wrong shape, hair too curly, too straight, too many freckles, too dark, too pale—you name it, preteens are suddenly and deeply aware of themselves and can feel overwhelmed by their worries. Create an accepting environment in your class, liberally sprinkled with humor that is not judgmental or sarcastic. Your preteens will learn from your model of kindness and humor that it is possible to “accept one another…as Christ accepted you.” They’ll feel safe and learn that these kids are truly their friends. This kind of environment will support the bond with the other kids who follow Jesus—because in the chaos of middle school, they’ll need people who accept them and remind them it’s valuable to follow Him.

5.    Practically memorize the conclusion, so that you can say those two or three sentences looking kids in the eye. You want to be able to see by their faces if they understand!

6.    Have two methods of memorizing the Bible verse “in the bag”—again, if one way doesn’t seem to work or you have extra time, you’ve got something fun and meaningful to do!

Even though it can be hard to reach each and every volunteer with encouragement and training resources, the process of building up the skills of your volunteers is a significant part of an effective children’s ministry. Training is a process whereby your volunteers improve and gain confidence in the skills they use. Training allows for growth and development of additional new skills. Training ensures vitality and freshness of the entire staff. And training helps your volunteers most effectively reach kids for Jesus!
Serving Christ through you,

Donna Lucas
Publishing Director
Gospel Light /Children’s Ministry Resources

Wednesday, February 22, 2012

Helping Children with Transitions

Helping young children transition from active times to more quiet parts of your lesson can be a challenge. You can create activities especially designed to give them a chance to calm down and turn on their listening ears. Here are a few suggestions:
  • Give children a warning when moving from one activity to another. A couple of minutes before you want them to finish what they are doing, say, "This is your two-minute warning. We will start putting away the toys (or crayons) in two minutes." As adults, we get frustrated when someone interrupts what we're doing. Children often have the same frustration when we stop their activity abruptly instead of giving them time to finish what they're doing.
  • If you want your students to move from an active to a quiet activity, provide a transition activity to help them calm down and get the wiggles out. This can be an action rhyme, "The Wiggle Song," a march around the room (getting slower and quieter each time around), or an action song such as "Head, Shoulders, Knees, and Toes" (getting faster and faster; then getting slower with each round until everyone ends by sitting down).
  • Play a game such as "Follow the Leader" to get the wiggles out before your quiet time. Tell the children that in this game everyone must do what the leader does. Explain that everyone can have a turn at being the leader. Begin by having the children walk around the room following your motions. Then begin to hop, skip, or tiptoe and have the children imitate your actions. Give each child a turn to be the leader (do not force any child to do this). As the child leads say, "It's fun to follow a leader. [Kayla] is being a good leader. We learn by following good leaders." Conclude the game by having the children follow you one more time as you move slowly to the story rug and then sit down quietly for the Bible story.
  • Do a fun action rhyme before the Bible story time, to help your students calm down and begin to focus their attention on you, the teacher. 
    Here's a rhyme you can try with your class to help with the transition to your Bible story about Jesus dying and coming alive again. Before doing the rhyme together, hold your open Bible and explain that the Bible is God's Word and it is true. Show your students how to hold their hands together, palms up, to look like an open Bible. Now lead them in this rhyme (younger children will either say the words with you or do the motions but probably won't be able to do both, which is fine).

    The happy birds sing in the trees.
         (Flap arms like a bird.)
    The pretty flowers nod in the breeze.
         (Nod head and sway from side to side.)
    The kangaroos jump up with joy.
         (Jump and hop.)
    Why are they happy? Hear them say
         (cup hand behind ear and say together),
    "Our Jesus is alive today!"

    Monday, February 13, 2012

    Happy Birthday!

    Make a list of your students' birthdays. (This Jesus Loves the Children Incentive Chart can keep track of attendance or memory verses plus birth dates. Comes in a pack of two.) As new children join your class, keep track of their birthdays, too. If you have a large group of students, consider having a monthly birthday celebration. Include everyone with birthdays during that month as your guests of honor. If you have a dozen students or less, try celebrating each child near the date of his or her birthday.

    Decorate one wall or bulletin board with this Birthday Celebration mini bulletin board set. It includes twelve cake slices labeled with each month of the year, 32 candles (one for each of your students), plus decorative balloons and noisemakers to put on the bulletin board. You may also want to give the birthday child a large Birthday star sticker that says, "It's my birthday!" These large 3 x 3-inch stickers come 36 to a package.

    Let the birthday child stand in front of the class next to you. Consider providing a special "Birthday Hat" for the child to wear during class. Celebrate the child's special day by leading the class in the Happy Birthday song. After singing it once through, add a second verse:
        God's blessings to you,
    God's blessings to you,
         God's blessings to [Jamie],
    God's blessings to you.

    You might want to provide an inexpensive present for the birthday child, such as a sheet of stickers. Choose napkins and a snack with a birthday theme (cake, cupcakes, muffins, circus animal cookies, etc.). Conclude with a prayer of thanks for the birthday child.

    If the child's birthday occurs during a time when your class is on vacation, send a "Happy Birthday" postcard. Visit ChristianEdWarehouse.com for birthday postcards. (Or send a card to each child the week before his or her birthday. Children love getting mail and they don't get it very often. How special to get a card from their teacher.)

    Wednesday, January 18, 2012

    Why Worry?

    Matthew 6:25-34 is one of the most frequently quoted Scripture passages in discussions about money and work. Sadly, there are some who use this text to imply that Jesus was against earning money and that He considered work a distraction from things that really matter. Nothing could be further from the truth.

    A careful examination of these verses reveals that Jesus was condemning worry, not work. He called us to make God the object of our faith, for He is the one who ultimately supplies our physical, material, and spiritual needs. The following are seven reasons why we should not worry:

    • The same God who created life in us can be trusted with the details of our life (verse 25).
    • Worrying about the future impedes our efforts for today (verse 26).
    • Worrying is more harmful than helpful (verse 27)
    • God does not ignore those who depend on Him (verses 28-30)
    • Worrying shows a lack of faith in understanding of God and His love for us. (verses 31-32).
    • Worrying keeps us from real challenges God wants us to tackle (verse 33).
    • Living one day at a time keeps us from being consumed with worry (verse 34)


    These are concepts we can start to instill in our youngest students as they watch us live them out in our own lives. So when we're tempted to worry, we can turn to God's Word instead!

    Monday, January 9, 2012

    Think of Yourself As a Tour Guide


    Think of yourself as a tour guide instead of just a teacher. Now picture your students as your tour group. You are actually life's tour guide for the children in your care. Your task is to plan the itinerary, show the children the places of learning, and then let them explore and discover God's Word for themselves. As you open Biblical places, scenes, people, and adventures, you can remind them that these are true stories from God's Word, the Bible. Help your older students understand that God's Word is not a fairy tale.

    Hold your open Bible when you say a memory verse or tell a Bible story. Say, "This is a true story (or lesson or adventure) from God's Word, the Bible." Point out the rich history of the places you mention. Use maps, charts, and visuals to help your students picture the people, houses, clothing, food, climate, and landscape.

    Talk with your students like a tour guide. For example, while finger painting or sculpting clay, talk about the color and texture of the materials. Describe what you and the children are experiencing. Let your students share their own descriptions. Linking language with sight, sound, and activities teaches important pre-reading skills to your preschoolers and helps reach students of all ages who learn in different ways. In fact, the more senses students use to experience a lesson, the more likely they are to remember the lesson long after it's over.

    (If you're looking for Bible lesson ideas, visit ChristianEdWarehouse for suggestions.)

    Monday, August 29, 2011

    Giving Positive Feedback to Your Students

    All students respond well to positive feedback. The key is to teach your point in a positive way, even when you feel like saying something negative. Following are a few tips for teachers:

    • Positive feedback must be a result of student behavior. This tells students that you are aware of their performance individually and in a group. Students will begin to see that you give feedback to the best performance of every individual.

    • Positive feedback should be given matter-of-factly. Flowery, emotional praise can embarrass students, especially preteens. Positive feedback should not imply that you are treating students any differently from the way you would treat an adult.

    • Use descriptive statements that briefly tell students what was worthy of comment. Praise their accomplishments or their efforts, not their personalities.

    • Positive feedback to individual students should be relatively private. Students can be embarrassed by comments that single them out as the “teacher’s pet.”

    • Give feedback to student groups whenever possible. Frequent group praise helps establish a sense of cooperation and community among your student group.

    • Eliminate pauses after giving positive feedback. For some students this can be very uncomfortable. Instead say, (Julie), good job on reading that Scripture, now let’s turn to…

    • Be persistent. Some students feel uncomfortable with praise because they have had so little. But every student needs to learn that he or she has enough self-worth to accept recognition from someone else.

    • Give students choices as much as possible. For example, "Would you like to do the craft first or the pencil puzzle?" Or, "You can turn in your project on time and I'll grade it this week or you can turn it in late and I'll grade it in a few months."

    • After giving students lots of choices, you can ask them to do what you're asking as a favor to you. For example, say, "Now that I've let you choose the activities today, I'd like you to pick up these papers as a favor to me."

    • When a student expresses anger, let him calm down before you respond. Let him know you're busy right now but you can talk tomorrow (or later). Show empathy toward the student. For example, you could say, "That's a bummer. Let's talk about it tomorrow. Don't worry about it." There is usually no need to take sides or make suggestions or give consequences on the spur of the moment. Often the students will come up with their own ideas after having a chance to think things through.

    • Give negative feedback in private, and make sure it's constructive and the student has ownership of the situation. For example, "I'm sorry you decided to turn in the project late. What were the consequences for a late project? That's right, you won't get a grade for a few months. I'm sorry about that. But don't worry. You can decide when to turn in the next project. Conclude in prayer with the student.

    Tuesday, April 12, 2011

    Prayer Bulletin Board Ideas

    The National Day of Prayer will be held on May 5, 2011. Get your classrooms ready for this special emphasis with colorful bulletin boards that encourage your students to pray. (For more ideas on celebrating the National Day of Prayer plus a free coloring page, see our blog post from February 21, 2011.)
    Use the One Nation Bulletin Board Set to give your room a patriotic flair.

    Place a flag of your country next to the Christian Flag. Teach your students the Pledge of Allegiance along with the Pledge to the Christian Flag:
        I pledge allegiance to the Christian flag
        And to the Savior for whose kingdom it stands. 
        One Savior, crucified, risen, and coming again 
        With life and liberty to all who believe.

    You may want to give your students a Pledge to the Flag Bookmark or a God Bless the USA Wristband as an incentive to learn the pledge. The bookmark includes the Pledge of Allegiance to the American flag, the Pledge to the Christian Flag, plus the Pledge to the Bible.

    Point out the symbols on the flags. Have a child lead your students in saying each of the pledges together. Have a volunteer thank God for letting us live in a country where we can freely worship Him. Have another volunteer pray for those in other countries who are persecuted for their faith.

    Mount these Showers of Blessings Up-Down-and-All-Arounds across the top of your display. Place star borders around your bulletin board or door frame.


    Give each child a Stick Kid Airplane Cut-Out (these come in packages of 36) and let him write a prayer request or praise on the banner. Each child can add his Airplane Cut-Out to the display as the class prays for his request.

    Set an example of prayer by praying for each of your students by name. Ask God to open their ears to hear His Word. Thank God for the gifts and abilities He has given each child. Finally, praise God for bringing them under your watch so you can model the love of Jesus to each one.

    Tuesday, March 8, 2011

    Giving Thanks At All Times

    Before your lesson, print the Mayflower picture from below. Tell your students the following story:

    Today we are going to be talking about thanking God. We have an example of some people long ago who thanked God. These people are the Pilgrims. They thanked God in good times and in bad times.

    How did the Pilgrims get to the New World? (In a ship called the Mayflower; show the Mayflower picture.) That trip was very hard. Storms tossed the ship. The Pilgrims didn't arrive in the new World until November, too late to plant crops before winter. So that first winter in the New World was very hard. Many people got sick. In fact the captain of the Mayflower stayed through the winter and Mayflower became a hospital ship. But the Pilgrims thought their hard times were God's way of testing to them to see if they had courage and faith. Let's pretend we are Pilgrims. It is winter, and it is cold. You are trying to build little cabins for the people to live in. (Have all the students stand and pretend to build.)

    During the middle of winter, many people got sick and died. Many of those were children. Some days, as many as three people died. (Pull out three students and have them stand to one side.)

    Now there are fewer of you to work. Some people were sent to the Mayflower because they were so sick. (Pull out three more students and have them stand in another area. Have the remaining students keep working.)

    By the end of winter, half the people had died. (Send half of your students to stand with the first three.)

    Do you think the Pilgrims gave up after that first year? No, they had a celebration to thank God. They invited their friends from the Wampanoag tribe to celebrate with them. That is how our first Thanksgiving Day started. If the Pilgrims could thank God through their hard times, we certainly should be able to thank God through our hard times, too.

    (Have everyone sit down. Let the students share some of the things for which they're thankful.)
    We have all felt grateful to God for something at some time. Perhaps you have felt grateful when God allowed something good to happen to your family like a new baby or someone who was sick getting well. Other time, we must thank God even when we don't feel thankful. God wants us to thank him when we're in a hard situation or when we feel depressed or sad. During those times, it's harder to thank God.

    (Talk with the students about some of the hard times they or their friends have gone through. Share a time in your own life when you thanked God during a difficult situation.)

    For most of us, thanking God is hard because we can't think of things to say. We forget about all the wonderful things God has done for us. Or, if we do notice them, we often forget to thank God for them. Let's talk about some things for which we can thank God right now. (Mention a few of your own praises, too.) 

    (Encourage the students to pray brief prayers of thanks for each thing mentioned by the others. Thank God for each student. Ask that each child will remember to give God thanks on a regular basis. Remember to pray for each child during the week.)

     
    Click the image above to print the Mayflower

    Monday, January 31, 2011

    Bible Memory Verse Treasure

    Use this memory verse game to help your students understand that God's Word is like a special treasure. Words from the Bible can teach us to act in ways that please God.

    Before your class, print each word of your memory verse (including the reference) on a 4-inch round piece of cardboard or yellow poster board cut to resemble a gold coin. Print one word per cardboard circle. Number the backs of the circles in order, if you wish (or print one set with numbers and one without).

    Decorate a box to look like a treasure chest or purchase a cardboard Treasure Chest (Item #CTP5999). See the picture above. Print the memory verse on a chalkboard, whiteboard, or poster board (or have an older student print it for you). Have a child read the verse from the Bible. Point to each word as it is read. Have everyone say it together.

    Discuss the meaning of the words, and have the children read the verse together several times. Then give your students the memory verse coins (one coin per child). Have the children stand in the order of the verse (choose two children to help them get in order, if you wish). Let the children drop the coins in the treasure chest one at a time, in order, reading each word as it is dropped in. Do this several times so everyone has a turn. Repeat (with the unnumbered coins), if time allows.

    Say, "The Bible is God's Word. Every word of the Bible is true. God's Word is like a special treasure. There are wonderful things in the Bible to teach and train us how to live to please God!"

    Tuesday, December 28, 2010

    Storytelling Tips

    By Brenda Mills


    Everyone loves a story. Children move to the edge of their chairs when they hear, “Let’s have a story.” Use this method of teaching to reach young hearts with Christ’s love. It’s your responsibility to become the best storyteller you can.


    Note that we said storyteller. Reading stories to children is an art in itself to be discussed later. First we’ll concentrate on the techniques of telling the story.


    A GOOD BEGINNING
    Prepare your introduction carefully. Begin your story smoothly. If you fumble through your first few statements, you’ll become frustrated and may lose your train of thought. If you stammer to a stop and have to start over you’ll want to leave the room and never return! Never memorize a story word for word. But if it makes you feel more comfortable, memorize the first few lines for a snappy opening.


    An introduction with interest-catching appeal will capture your listeners from the first word. “Mac had been Peter’s dog for as long as Peter could remember, and they were real pals.” Doesn’t that sound like a lot more fun than ‘Peter had a dog named Mac?” Use your imagination and knowledge of the group to make your introduction sparkle.


    PROCEED TO CLIMAX, CONCLUSION
    Progress naturally from the introduction, building to the climax or most exciting or interesting portion of the story. Then finish the story with a brief conclusion. Don’t attempt to delay the conclusion, for once the climax of the story has been reached, listeners’ interest drops. A story is a unique teaching tool. Most contain a moral or teach a lesson. Let the story do it! Don’t attempt to tack on your own “sermonette” on the end of the story. Weave the moral into the plot in such a way that your hearers can’t miss it as you tell your story. When you’ve finished telling the story, stop!


    BE NATURAL
    Being yourself is important. Thorough preparation and practice will lead to naturalness in storytelling. You’ll probably feel most comfortable if you sit in a circle or semi-circle with your listeners. It suggests intimacy with the group and conversation at their level. If you must stand, due to a large group, stand naturally and relaxed. Never hide behind a podium.


    A LITTLE ACTION, PLEASE
    Use gestures such as the shrug of the shoulders, a raised hand, a finger over the lips to indicate quietness. But don’t force or overuse them. And by all means, use facial expression. Raise your eyebrow, smile, frown, show enthusiasm. Try to portray the feelings of the story characters.


    Some storytellers show pictures while telling their stories. This is fine, but don’t show 27 pictures during a four-minute story! Have several attractive illustrations to use at the appropriate times. Display them so all can see, then put them aside.
    Place your hands quietly in your lap when you aren’t holding a picture or gesturing. Avoid the “gymnastics” of too many hand motions. They only draw attention to yourself. Beware of distracting habits, such as playing with a string of beads or a button on a jacket. Remember, you are the means to help your listeners SEE the story in their minds. The less they see of you, the better! Thorough practice, perhaps in front of a mirror, will help you know where and when to use gestures effectively. If well used, they can add life to the story. If overused, they can distract and spoil the story.


    LISTEN TO YOURSELF
    Your voice tells the story. Use your natural voice. By all means avoid a whiny, monotonous, or honeyed tone. Practice to develop variety in inflection. Let your voice reflect wonder, strength, sadness, etc. Imitate noises and sounds indicated in the story, such as “Buzzzz — was the sound Kate kept hearing outside her bedroom window.” Practice these sounds beforehand so they resemble the natural sounds. Pause to impress or to increase suspense. Work on projecting your voice. Record your own voice — it may surprise you!


    Use dialog or direct discourse frequently to bring your characters to life. Make them speak to your hearers , rather than always telling your hearers what the characters say. “Hi, Mom!” is much more realistic than, “Jerry greeted his mother when she entered the room.” Change the voice to indicate the different characters. Use action verbs and colorful adjectives to tell your story. Never use words your listeners may not know.


    If you suddenly discover that you’ve left out an important point, don’t try to correct it by saying … “Oh, I forgot to say…” Continue on, and if it is an integral part, weave it in. But don’t interrupt your story to apologize for your goof!


    When you’re telling a Bible story, hold your Bible so all can see it. This especially impresses little children with the fact that your story is from God’s Word.


    “Let’s have a story.” Do your students’ eyes brighten at the sound of those words? Use these helps to make story-time an exciting high point in your class.

    Monday, December 13, 2010

    Decorating for Christmas

    In some churches, decorating the church building with pine boughs and wreaths is an annual tradition called the “hanging of the greens.” Decorating your classroom for the season doesn’t have to be an expensive or elaborate proposition. Here are a few money-saving ways to involve parents, friends, and your little ones in sprucing up your classroom for Christmas:
      •   Spice up a small tree with the wonderful smell of cinnamon sticks. For each ornament, tie three or four cinnamon sticks together with ribbon. Glue a cluster of three cranberries to the sticks for a festive touch.
      •   Cut doves, angels, stars, manger scenes, and other items from old Christmas cards. Punch a hole in the top of each card, add a ribbon hanger, and hang from the tree.
      •  Tie colorful ribbons onto your Christmas tree. See how many bows, large and small, you can create.
     •   Let each child glue three craft sticks together to form a snowflake shape. Spread glue on the sticks and sprinkle with glitter. Add a sticker in the middle of the snowflake (one sticker on each side). Use these Jesus Dazzle Stickers or others you have on  hand. Tie a yarn hanger to each ornament.
     •   Decorate plain glass ball ornaments with glitter glue. Let each child use a paintbrush to create a personalized and unique family treasure. Make sure each person initials and dates the ornaments he or she creates.
      •  String beads and jingle bells onto chenille wire or ribbon. Twist lengths of wire together to form long garlands or twist the ends of one wire together to form a “bracelet” to hang with ribbon from the ceiling.
      •  Cut colorful paper into 8-inch strips and link the strips to form a paper chain. Make several, and hang the paper chains in your windows and doorway.
      •  Have older children make paper chains to take home. Let them print a Scripture verse on each chain link before gluing them together. Encourage them to read one verse to their families each day between now and Christmas. Choose verses that tell the Christmas story from Luke or Matthew.
      •  Fold white paper into a small triangle. Then cut a variety of shapes from the triangle. Unfold it to form a snowflake. Sprinkle it with silver or gold glitter glue, if you wish. Tie a string or piece of thread to the snowflake so it can hang from your ceiling or in a window.
      •  Collect pinecones (and fir cones). Spread glue on the cone and let the children add glitter. Wrap a wire around each cone, nearest its large end. Bring the wire up at the back of the cone and twist it into a loop for hanging. Tie a colorful ribbon into a bow around the wire at the base of the cone.
      •  Place a plastic or wooden creche (nativity scene) under the tree to help the children focus on the real meaning of Christmas—Jesus! Make sure your nativity figures are not breakable. As the children play with the figures, talk about the Christmas story and how Jesus was born and died for our sins (the wrong things we say and do). Explain that Jesus came alive again and now lives in heaven with God. Let the children retell the Christmas story as they play.


    Tuesday, November 23, 2010

    Discipline Basics

    Discipline tells a child that you care enough about a child and want him to behave in a manner that you know to be right. Be sure your youngsters know what kind of behavior is acceptable, and set limits and boundaries for them while they are with you. It’s unfair to punish them for breaking rules they didn’t know existed.

    Here are five guidelines for maintaining good discipline:

    1. Establish the necessary standards and limits at your very first meeting, and make sure everyone knows what they are. Keep the list short!

    2. Consistently enforce the standards. If they’re not worth enforcing always, for everyone, they’re probably not worth having.

    3. Be reasonable in your expectations. “No talking” is not reasonable. “No talking during prayer time or when someone else is speaking” is a reasonable rule and should be enforced. Simply stop talking until the offender realizes he’s the cause of the problem. Your silence should be sufficient. The second time it might be necessary to say, “Ricky, you’re interrupting our story. Please stop talking so I can continue.” If it happens a third time you might say, “Ricky, the next time I have to stop this story because you’re talking, you’ll have to leave the group.” Then be sure he’s removed (quietly) if it does happen again.

    4. State your expectations before transitioning to a new activity. Let children who attend regularly repeat the expectations for visitors to hear and as a reminder to everyone else. Be sure to restate the expectations each week and before each activity. Don’t expect children to automatically remember to raise their hands before talking if you haven’t reminded them.

    5. Be logical about punishment that must be administered. Don’t make a federal case out of a minor infraction, or you’ll have to send a major offender to jail! If a child smears glue in another child’s hair during craft time, separate the offender from the glue for the evening, or have him work alone at a table. Children do bizarre things at times on impulse — usually to get attention!

    Once you’ve established your standards and enforced them firmly and fairly for awhile, the best rule to follow is to assume that each child can be trusted to handle his own behavior until he proves otherwise. Let the youngsters know that this is what you expect now. Then, when a child misbehaves, you can let him know that you’re disappointed that he isn’t ready to be in charge of himself in the group, and that you’ll have to help decide where he should sit, and whether or not he can work with others. Make it clear it’s the behavior you’re disappointed with — not the child. When the child and you determine that he’s ready to try to be in charge of his own behavior again, emphasize how much you want him to be successful this time.

    Children who have serious problems at home will test you to see if you really care about them. Some will try your patience to the limit before they’re convinced you really like them. You can usually spot such children during your first meetings. They’ll be doing everything possible to get you to notice them.

    Love and discipline are inseparable. Love wants what’s best for the loved one. The product of no discipline during a child’s early years is irresponsibility, which leads to lack of self-respect, and can mean unhappy, unproductive adult life.

    Find some strength or asset in each child that you can commend him for. If you’re sincere they’ll know it — and your efforts will be rewarded. Make a point of emphasizing the positive qualities of every child, no matter how hard you have to look to find them sometimes! Reward the positive behavior and try to overlook the negative as much as possible.

    One primary goal of your time with the children is to provide opportunities for leadership training, but you can’t develop leaders out of children who don’t believe they have worth, or who have a poor self-image.

    While these basics will not solve every discipline problem you may encounter in your class, they will go a long way to making sure your classroom is a happy, fun environment where the children can effectively learn about their heavenly Father.

    Monday, November 15, 2010

    More Tips for Teaching Twos and Threes

    Here are some hints and tips we've put together for teachers of two- and three-year-olds. However, some of these tips will work well with your preschoolers of all ages. Visit our website, ChristianEdWarehouse.com for more hints and tips.
    One Eye + One Ear = Two Learning Opportunities
    Everyone knows that twos and threes learn through sensory experiences. But do you know which senses provide the best learning experience? Studies have shown that children learn 1% by taste, 1.5% by touch, 3.5% by smell, 11% by sound, and 83% by sight! The more senses a child uses, the more learning that takes place. Your little ones will remember best when all their senses—sight, touch, hearing, smelling, and even taste—are involved in learning. In your Bible lessons, you will want to include activities that use a variety of senses. Check out
    Honeybees for Jesus Bible curriculum for lots of sensory experiences and activities for teaching the Bible to two- and three-year-olds. For classroom decorations and bulletin board sets, visit our Classroom Decoration Store.
    Hard at Play
    Are your toddlers playing or learning?
    If they're playing, they're also learning! According to psychologist Gary R. Collins, playing performs four important activities:
    (1) it provides a release of energy,
    (2) it stimulates thinking,
    (3) it develops motor skills, and
    (4) it encourages the child to act out role models for future reference.

    And you thought they were just having fun!
    Clean Finger Paint
    Mix 1 cup powdered soap or detergent with 1/3 cup of liquid starch (or 1/4 cup of water). Beat with an egg beater until fluffy. Use this mixture as paint on brightly colored (or black) construction paper. The contrast between the paint and the paper will provide a delightful experience for your children. As the children work, talk about how God gave us eyes to see many colors. Explain that God gave us hands for touching many textures. Thank God for giving us all five senses and for creating a beautiful world for us to enjoy.

    Monday, November 1, 2010

    Hints and Tips for Teaching Twos and Threes

    Teaching twos and threes can be a challenge. They can be cute as a button one minute and strong-willed and defiant the next. Some days can be simply exhausting trying to get them to focus their attention on God and His Word. But the next minute, your little ones can come up with the most insightful prayer or comment about God. What a huge blessing! Here are some hints and tips to help you face those challenges and to equip you to watch for the blessings. More hints and tips for teaching this age group are on our website, ChristianEdWarehouse.com.

    Spiritual Building Blocks
    Twos and threes are laying a foundation for future spiritual development. One basic foundation block for every child is learning the difference between right and wrong. Teach them that some things are always right and some things are always wrong. But remember when correcting a child, two-year-olds (and younger threes) respond better to distraction than to reasoning. Be sure to get the child's attention before speaking. Adults often waste breath, saying things when no one is listening. For instance, shouting across the room to a child simply results in confusion rather than communication.

    Say the most important words first. Begin with the child's name, then state briefly what action you want the child to do. Finally, add a reason why: "[Timmy], you can feed the birds now. I think they are hungry." Phrase suggestions, directives, and corrections in positive terms: "[Janna], blocks are for building, not for throwing."

    Use specific words. General terms leave a child confused. Rather than, "Put the toys away," say, "[Evan], your red truck needs to go here on the shelf." Make a clear distinction between when a child has a choice and when he does not. Ask a question wen you are willing to let the child have a choice: "[Molly], would you rather look at a book or do a puzzle?" Use questions that focus the child's attention on the situation but leave him free to determine the action: "[Elliott], it is time for our snack. What do you need to do with your ball?" 

    When his obedience is necessary, make a direct statement (do not ask a question), assuming cooperation. A statement such as, "[Elliott], you need to put away your truck," lets Elliott know you mean business. Be alert and sensitive to each child. Ask the Holy Spirit to guide you.


    Tuesday, October 19, 2010

    Hints and Tips for Teaching Children in Grades 3-4


    We've put together some hints and tips for teachers of third and fourth graders. However, many of these ideas can be used with children of all ages. Visit our web site, ChristianEdWarehouse.com, for more hints and tips for teaching the Bible to children.

    Memory Verse Chain
    Challenge your students to memorize as many Bible verses as they can in one month. As each child says his verse to you, add a link to a paper chain with the student's name and the memory verse reference written on it. This is something everyone can contribute to, even if it is just one link. At the end of the month, present the chain to the church and request that it be displayed in a prominent place with a sign indicating that the chain represents the Bible verses memorized by your class in one month.

    Making a Difference 
    Children this age are beginning to realize that their activities and beliefs can make a difference in their lives and in their world. They are anxious to use their abilities in beneficial ways. They need projects that show them they can make significant contributions at home, school, church, and play. Involve them in church workdays and service projects. Let them collect canned food for distribution to local families or food pantries before Thanksgiving.

    A Get-Well Tree
    Make this clever tree to cheer up a sick classmate. On a poster board, have one of your students draw a large tree with no leaves and print:
         To _____ (the name of a sick member), and
         From _____ (the name of your class).
    Cut large leaves out of various colored construction paper. Have each student write of draw a get-well message on a leaf and then glue it to the tree. Have one or two of the students go with you when you deliver the get-well tree to the class member who is ill.

    The Key to Student Involvement 
    The key to involving elementary-age students in any activity is to capture their interest. They have an adequate supply of energy to work diligently for increased periods of time on projects that interest them. Capture their interest and challenge them. They will respond.

    Good Graffiti Corner
    Post a large sheet of newsprint or butcher paper in a prominent place. Inform your students that his is a "good graffiti" wall, a place where they can jot down their thoughts and feelings, messages to friends, etc. A "good graffiti" wall is a great ice breaker. It gets student involved and encourages interaction and communication. Keep the good graffiti wall up for several weeks. Some students will come early or stay late just to put something on the wall.

    Tuesday, October 12, 2010

    Relating Successfully to Preteens

    Knowing as much as possible about your preteen students can be a big help in improving your teaching effectiveness. First of all,  it's important that you know the physical, mental, social, emotional, and spiritual characteristics of the age group with which you work. Knowing these facts—why kids act the way they do—can affect how, why, and what you teach. Meet with your coworkers to study these age-level characteristics.

    Then accept kids where they are. Accept them because of who they are, and respect them! There's no room for "favorites" if you want to reach all the kids in your group. Every preteen has something special about himself and something unique to offer. Find out what it is, and get busy helping that young person feel special and wanted.

    Challenge your students to participate. Use them as helpers and leaders. All-Stars for Jesus Bible Clubs are expressional training programs designed to involve kids and let them learn by doing. So don't always do things for them. You as the teacher should always be available and ready to help, if needed, but you should sometimes be in the background. Instead of finding the answer for them, show them where they can find it for themselves.

    When your students get restless, you as the leader always need to ask "why?" Usually it's because (1) the activity is too long for the attention span of the group or (2) the activity itself is boring. If this is the case, it's your responsibility as the teacher to correct the situation. Change the activity and always have a variety of activities up your sleeve in case one doesn't work out or is over faster than you anticipated. Again, be prepared. Your preteens will seldom grow bored or restless if there's a fast-moving, variety-filled program or lesson in which they are actively involved.

    Give your preteens plenty of responsibility—not just by participating in programs, but in maintaining the appearance of the room, distributing and collecting materials, and in general, being a contributing member of the group. Provide your preteens with plenty of meaningful tasks, even if it would easier to do them yourself. Always thank your students and show your appreciation.

    Youngsters, even preteens, are looking for role models. You have a unique opportunity and responsibility as a preteen Bible teacher to be the kind of positive, Christian example they need!

    Monday, September 20, 2010

    Edible Finger Paint

    Bring new combs of various sizes (one for each child), wet wipes, and prepared vanilla or strawberry pudding. Bring a sheet of finger paint paper or wax paper for each child. Cover the work area with newspapers or a plastic tablecloth.

    Have the children wash their hands. Spoon a scoop of pudding on each child’s paper. Have the children comb through the pudding to make patterns on their papers. Show them how to use their fingers to make a variety of designs.

    Say, "I smell something good. It smells like vanilla (or strawberry). Do you smell it? I’m glad God made us with noses so we can smell good things."

    Let the children use their fingers to print their names on their designs. Use a permanent marker to print the names of younger children (or help the child use her finger to help her print their names).

    Set the papers aside to dry. Let the children taste their fingers. (Make sure no one is allergic to the pudding.) Say, "This finger paint tastes good, too. It tastes like vanilla (or strawberry). Did you taste it? I’m glad God gave us mouths so we can taste good flavors." Use wet wipes to clean sticky fingers.

    Say a prayer of thanks to God for giving us hands to create, noses to smell, and mouths to taste.

    Monday, August 30, 2010

    Ten Commandments Bible Lesson

    Before your Sunday school or Bible club class, cut two tablet shapes from construction paper. Print five commandments from Exodus 20 on each tablet. Use the Bible version you prefer or simply write a summary of each commandment. Glue each tablet to a piece of sandpaper or a slab of stone to make them look more realistic.
    Ten Commandments Bulletin Board Set 
    Another option is to prepare a Ten Commandments Bulletin Board (item #CD210003). This bulletin board set is just $12.99 and can be ordered from ChristianEdWarehouse.com or by calling 1-800-854-1531. Click on the bulletin board set for more information. A summary of each commandment is included, each on its own tablet. Hand one commandment to each child and let him place it on the board as you discuss it.


    Ten Commandments for Kids
    You may also want to use Ten Commandments for Kids Chart to help your visual learners. This chart is available for just $2.99 each (item #CD6359) at ChristianEdWarehouse.com or by calling 1-800-854-1531. Click on the chart image for more information.


    Show the Ten Commandment tablets to your students. Say, Moses climbed the mountain to meet with God so God could give Moses His Commandments for the Israelites. Why did God have to give them these rules? Aren’t they just common sense? Have different students (or adult or teen helpers) read each commandment from Exodus 20. Then discuss it. Have verses 1-3 read. Why did God have to tell His people to worship only Him? (because He is the only true God)

    Have verses 4-6 read. Ask, Who made graven images (idols)? (countries who didn’t worship the true God) Why would God need to punish the whole family? (People imitate what their parents do; if their parents worship idols, they would tend to worship idols, too.)

    Have verse 7 read. Ask, What does it mean to take God’s name in vain? (“Vain” means “not as intended” and “empty.” To misuse God’s name as a swear word is not what God’s name was intended for. It shows disrespect for God.)

    Have verses 8-11 read. Ask, Does this mean that we have to do nothing on Sundays? (It means we worship God then and do not forget to take time to do so.)

    Have verse 12 read. Does God mean that we have to honor and obey only biological parents or does He mean anyone who is responsible for us? (It means we obey our caregivers, whoever they are.)
    Have verse 13 read. Does God mean that if we treat someone in hateful ways but don’t actually kill them, that’s okay? (No, it means we should not think or say murderous things with our eyes or words. Jesus clarified this in Matthew 5:21-26.)

    Have verse 15 read. If anyone wonders why you skipped verse 14, tell them that this verse deals with what adults do, not what children usually do. Ask What is stealing? (taking anything that does not belong to you, no matter how small, without permission)

    Have verse 16 read. Say, Bearing false witness means to lie, to say something that isn’t true. Is it ever right to lie? (No, you should always tell the truth, but out of love so that you don’t hurt someone.)
    Have verse 17 read. Ask, Why is it wrong to wish for things you don’t have that belong to others? (because it can lead to stealing and lying to get them for yourself, and God wants us to be content with what we have.)

    Toss a foam ball to a student and have her give the first commandment. Have her toss the ball to another student who will give the second commandment, etc. If anyone has trouble remembering his commandment, the rest of the group can help. If necessary, refer to the Ten Commandments Tablets. Encourage your students to follow God's commands during the week. 


    Ten Commandments Certificate
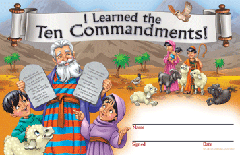
    Give a Ten Commandments Certificate to each child who can say all Ten Commandments (with your help) after this lesson (or the following week). These certificates are available in packages of 36 for just $2.99 (item #CD201007). Click on the image for more details and to order the certificates. Visit ChristianEdWarehouse.com for more classroom decorations and teaching ideas.

    Tuesday, June 1, 2010

    Bible Teaching—What's the Point?

    Why teach children Bible stories? Can young children really understand stories about God and His Son, Jesus?

    Bible Stories help children learn to develop a personal relationship with Jesus. 

    The first five years of a child’s life are the most important developmentally. We can help children develop into worshipful people who love God and Jesus. During the preschool years, a child can easily be taught foundational attitudes about God, Jesus, the Bible, and the church that will stay with him for the rest of his life. Psalm 139:1-16 reminds us that God knew us before we were even born and “all the days ordained for [us] were written in [God’s] book before one of them came to be.” Even the smallest child can begin to understand that God is love by interacting with a Christian teacher or friend who communicates a love for God and His Word through words, actions, and attitude.

    Bible Learning activities teach children God’s Word, the Bible.

    A child’s learning abilities are greatest during her first five years of life.  In fact, a child’s learning and remembering abilities are far greater during her first five years of life than they will ever be again. This is an ideal time to begin saying memory verses with children. Even very young twos who aren’t talking much can begin to absorb God’s Word as you and the other children say simple Bible Words together.

    Creative Bible activities help children grow in their faith.

    We can easily communicate important spiritual concepts to children—even toddlers and preschoolers. They are open and ready to worship God. Little children have an inborn desire to worship. We can give them lots of opportunities to sing, pray, and praise God during our time with them. So in our children’s Bible programs, we want every activity we do to focus the child’s attention on God, Jesus, or the Bible.

    Our Bible programs can help meet children’s physical, emotional, and spiritual needs.

    Children need Christian role models in addition to their parents. We are those role models. As the children watch us pray, worship, read the Bible, use kind words, and show love to them, they learn important Christian concepts.

    Our programs should lay a foundation for faith in Jesus Christ. This does not mean that every child will make a personal decision to follow Jesus before the age of five or six. Some will. But even preschoolers and toddlers can understand that Jesus is God’s Son; Jesus was born, grew up, and told people of God’s love; and Jesus loves us. We need to begin planting God’s Word in the hearts of children, so that they are able to make a personal decision for Christ in the future. We can teach the Bible as God’s Word, including saying and understanding Bible verses; teaching children to respect, obey, and love God’s Word; and helping them understand what is appropriate behavior. Preschoolers can understand that the Bible is God’s special book, the Bible contains stories about God and Jesus, and the Bible tells us that God loves us.

    The continual aim of our programs should be to help children develop a relationship with Jesus.

    We also need to help them learn responsibility to God, parents, and others. Many older children and even some adults today do not accept responsibility for their actions. We can teach our students that God planned for families, and children should love and obey their parents. We can also help them understand that wrong behavior is sin, and good behavior pleases Jesus. This is an important concept for even the youngest child to understand. If a child understands this, he can understand that God sent Jesus to forgive him. This provides the foundation for the child to accept Jesus as Savior.

    Even young children can learn to worship and serve our awesome God!